Setting Up Option Groups
Option groups split a long personalization form into named tabs, so customers fill in one part of the product at a time instead of scrolling through every field at once. They are made for products sold as a set: six bookmarks, a family of ornaments, a three-panel poster, where the same few fields repeat for every piece and a flat list leaves customers unsure which piece they are filling in.
Each group also drives the preview: opening a tab jumps the preview to the design in the same position, so what customers see always matches what they are typing. Your own workspace follows the same tabs.
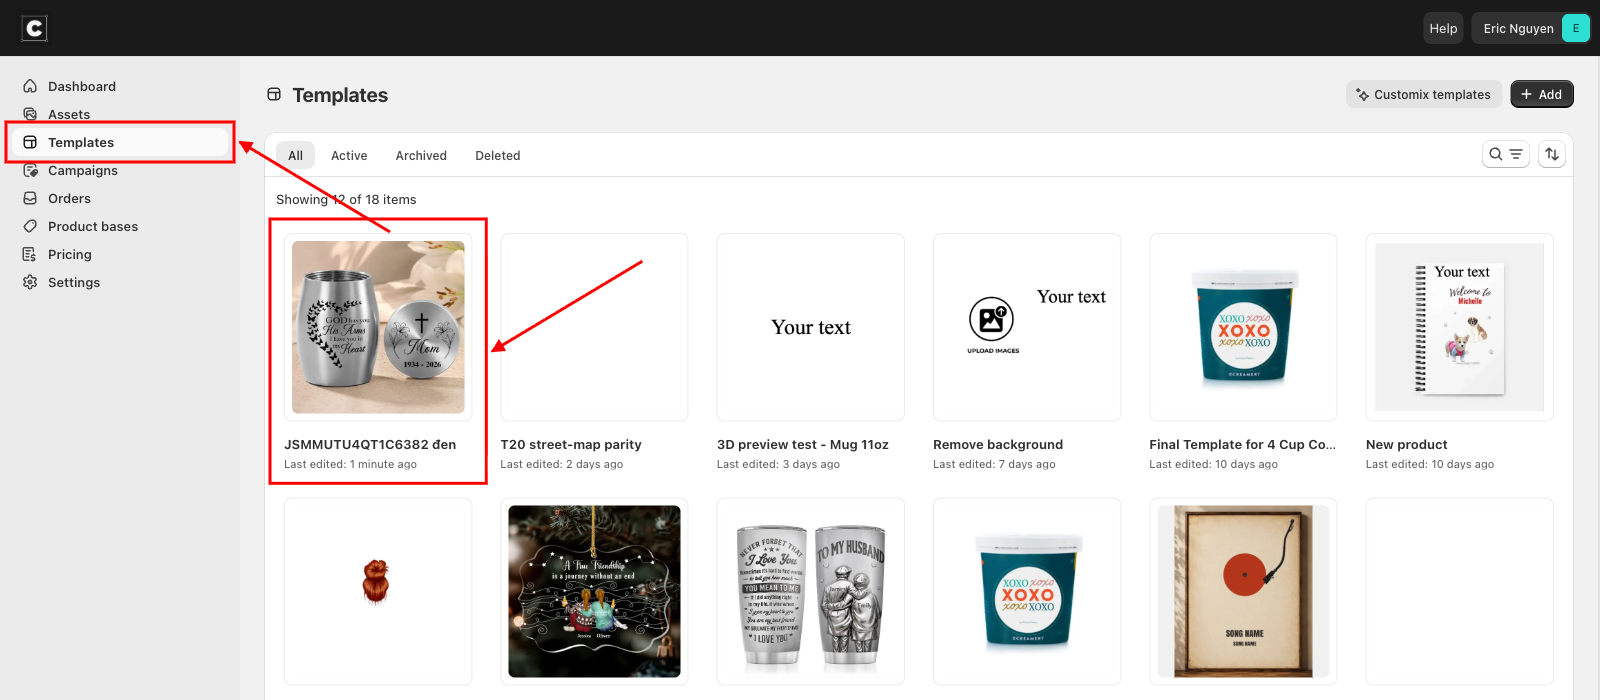
To set them up, go to Templates in the left sidebar and open the template for your product.
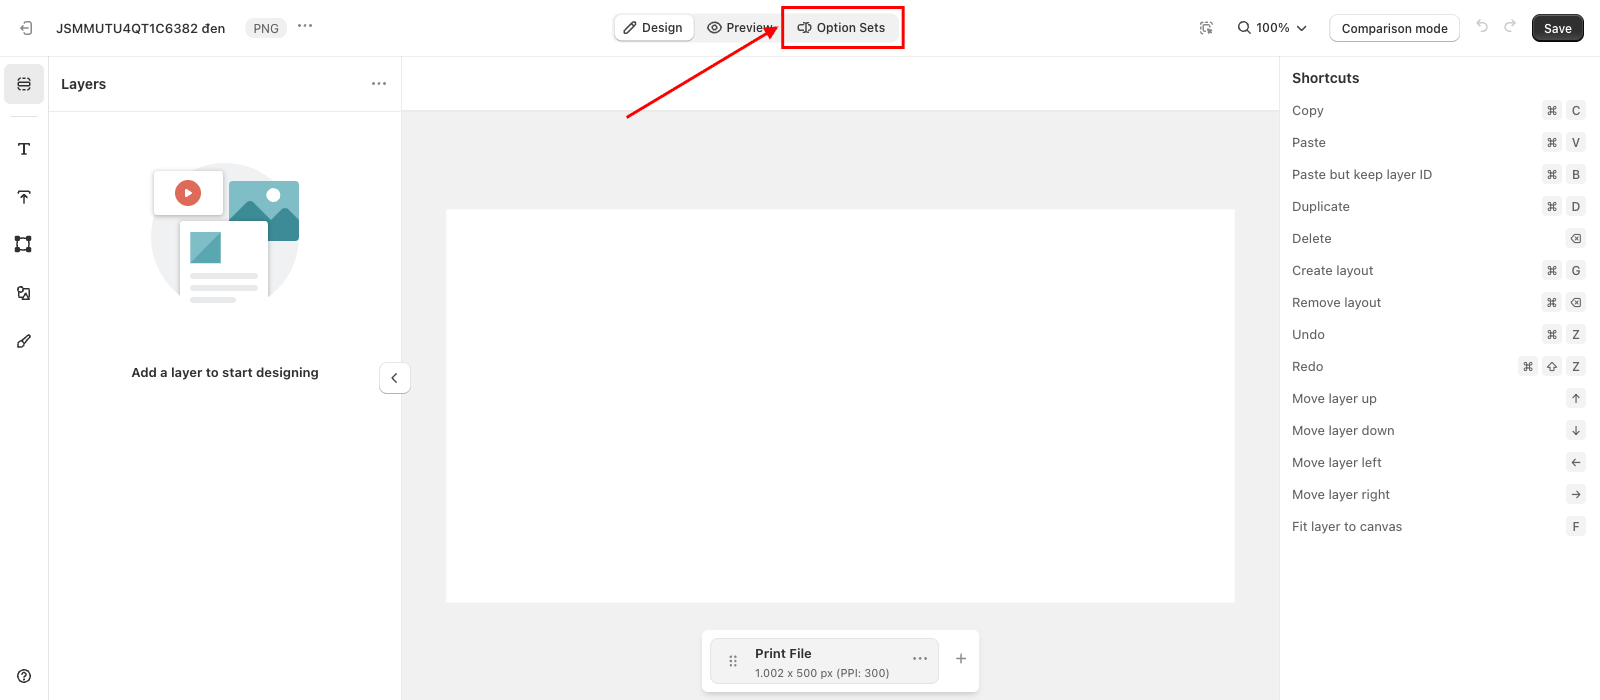
Then switch to the Option Sets tab at the top of the editor.
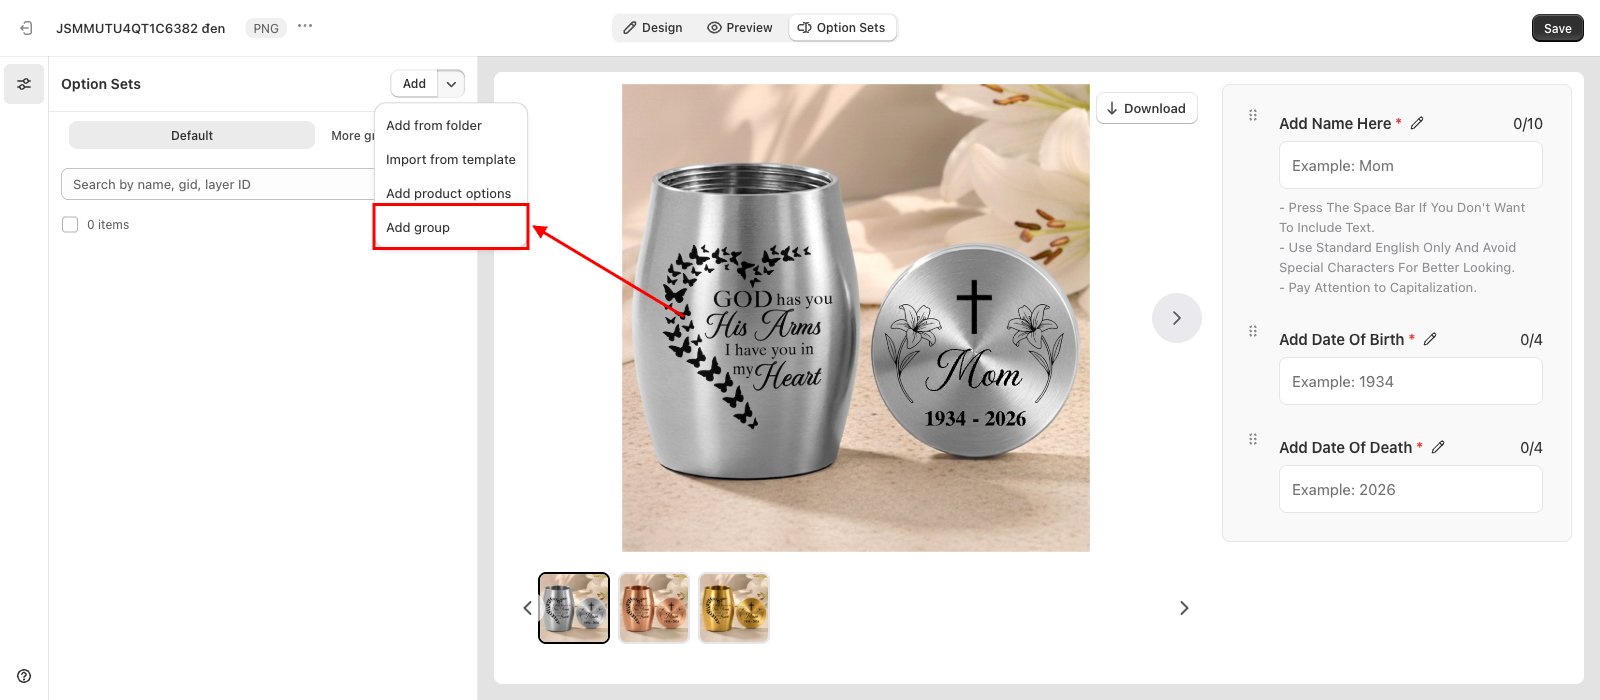
Create your groups
Open the arrow beside Add and choose Add group — once for each part of your product.
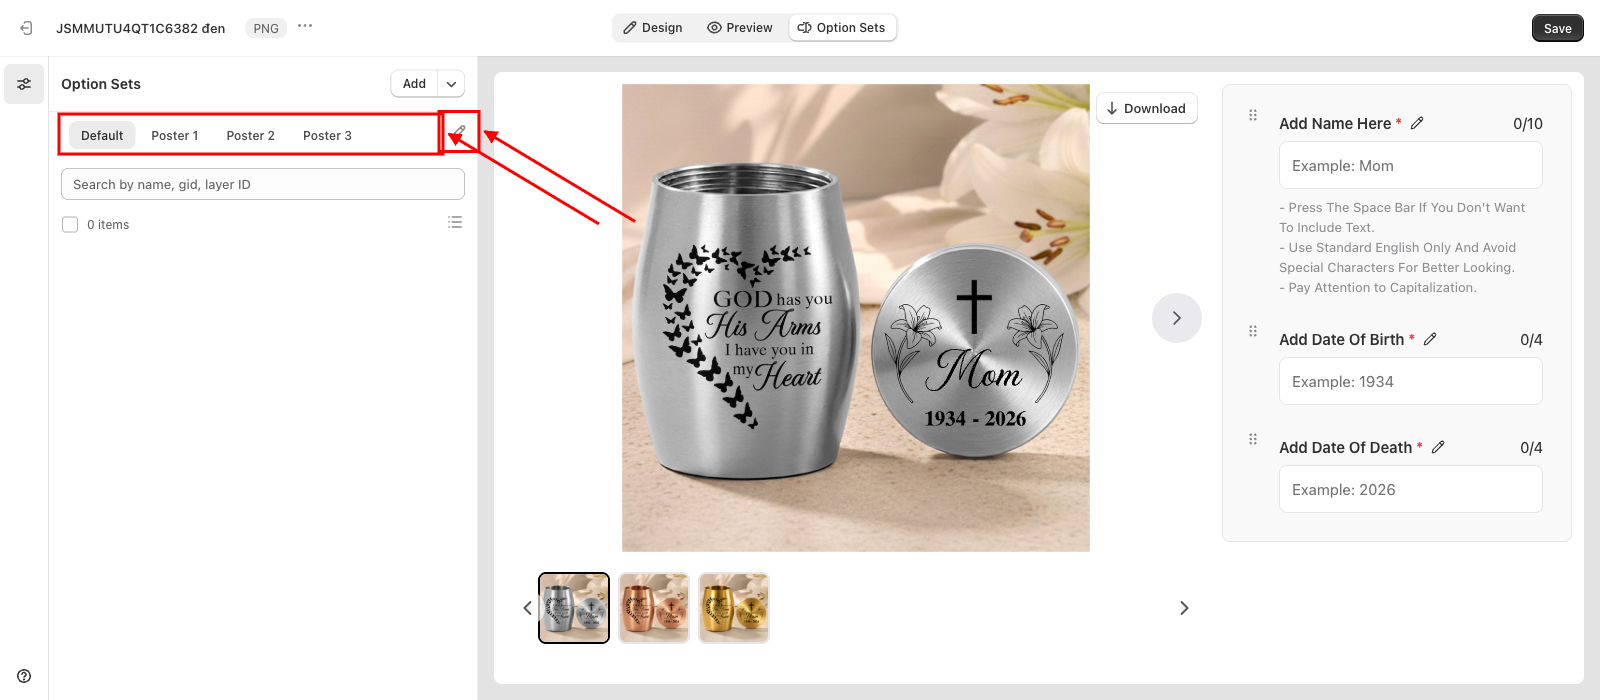
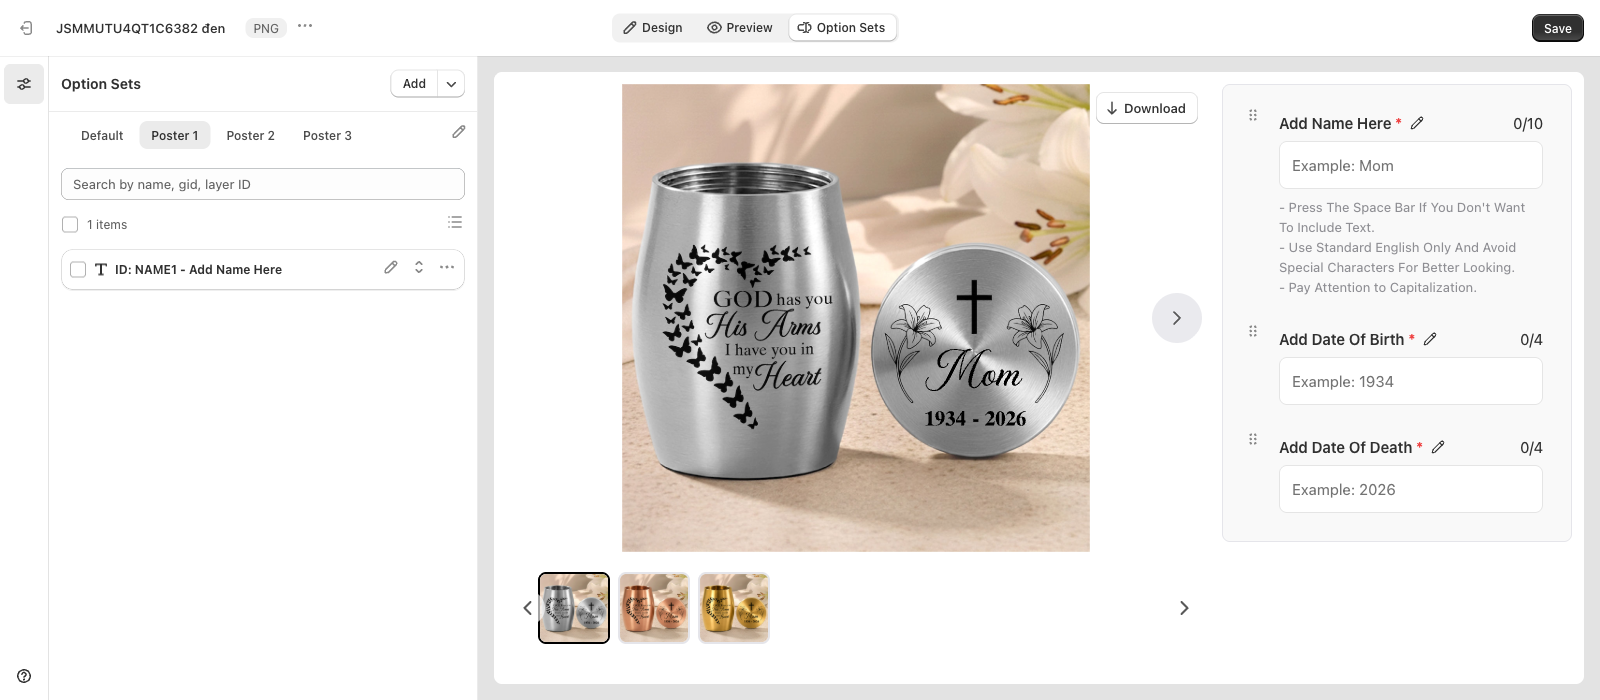
Your groups become tabs above the option list, with a Default tab always first. Selecting a tab shows only that group's options, so you work on one piece at a time. Extra tabs that do not fit collect under a More groups button.
Rename, reorder and remove groups
The pencil button to the right of the tabs opens Option groups, where you manage the whole set at once.
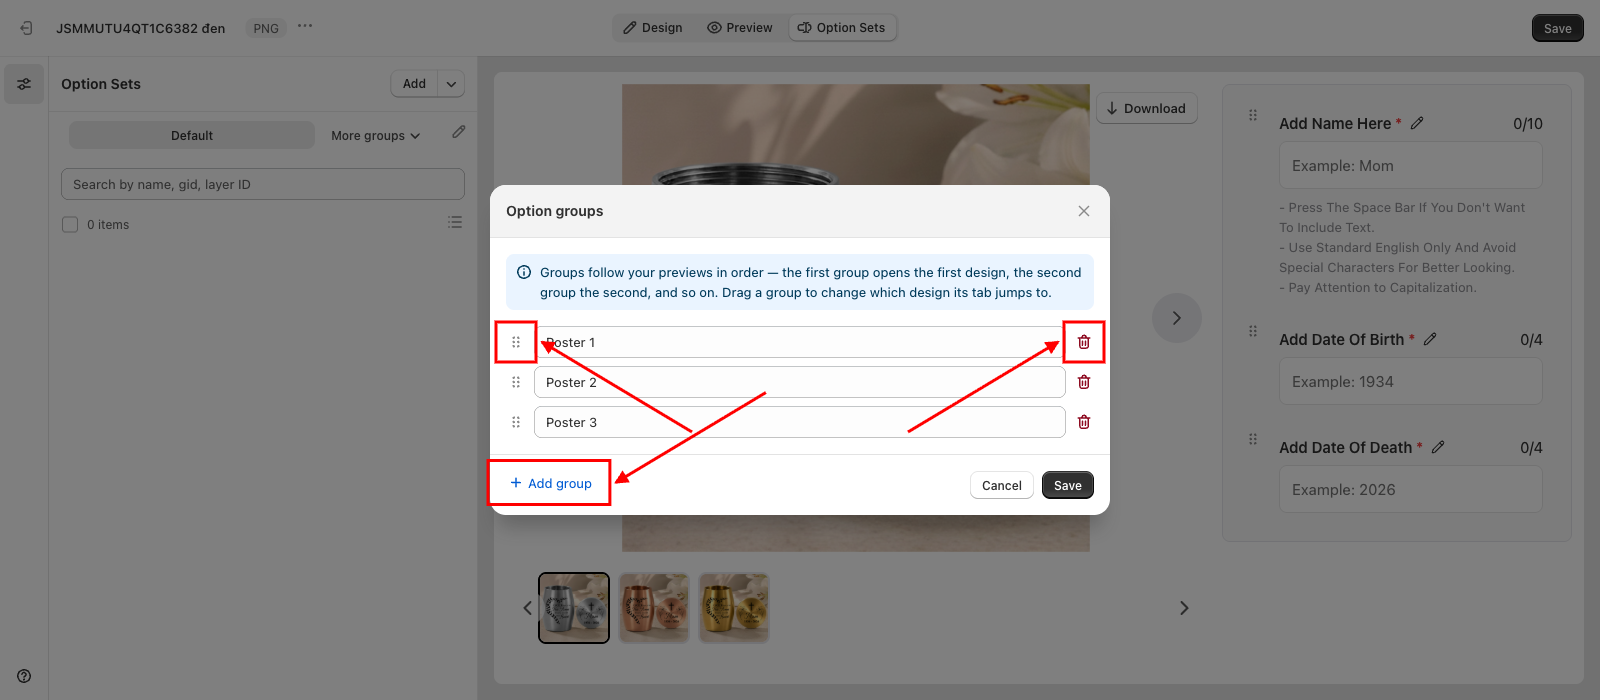
- Name: type straight into the field. Use the words your customers would use — Bookmark 1, Left panel, For Mom — not internal codes. Up to 100 characters; an unnamed group is ignored, so it never reaches customers as a blank tab.
- Order: drag a group by the handle on its left. This is the tab order, and also the order the preview follows — first group, first design. Line your groups up with your designs and the preview takes care of itself.
- Remove: the bin icon deletes a group. Its options are not deleted — they go back to having no group.
Nothing changes until you click Save, so you can back out with Cancel. You can create up to 30 groups in one option set.
Put each option in a group
Open an option from the list and pick its group in the Group section, just below Condition.
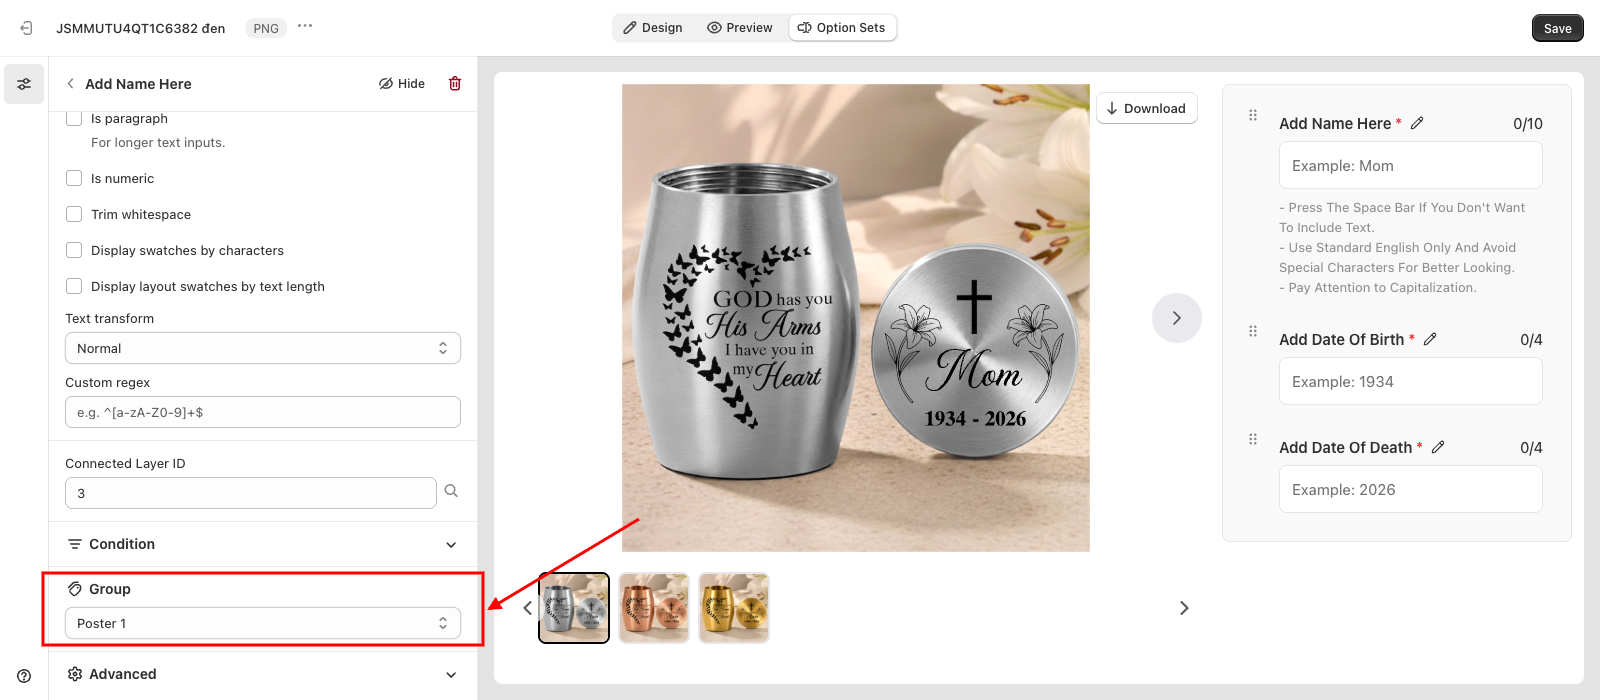
The option then moves under that group's tab in the list.
For a long option set it is quicker to move several at once. Tick the options you want or Select All to take the whole tab then open the … menu above the list and choose a group under Add to group. Pick No group there to take options back out of their group.
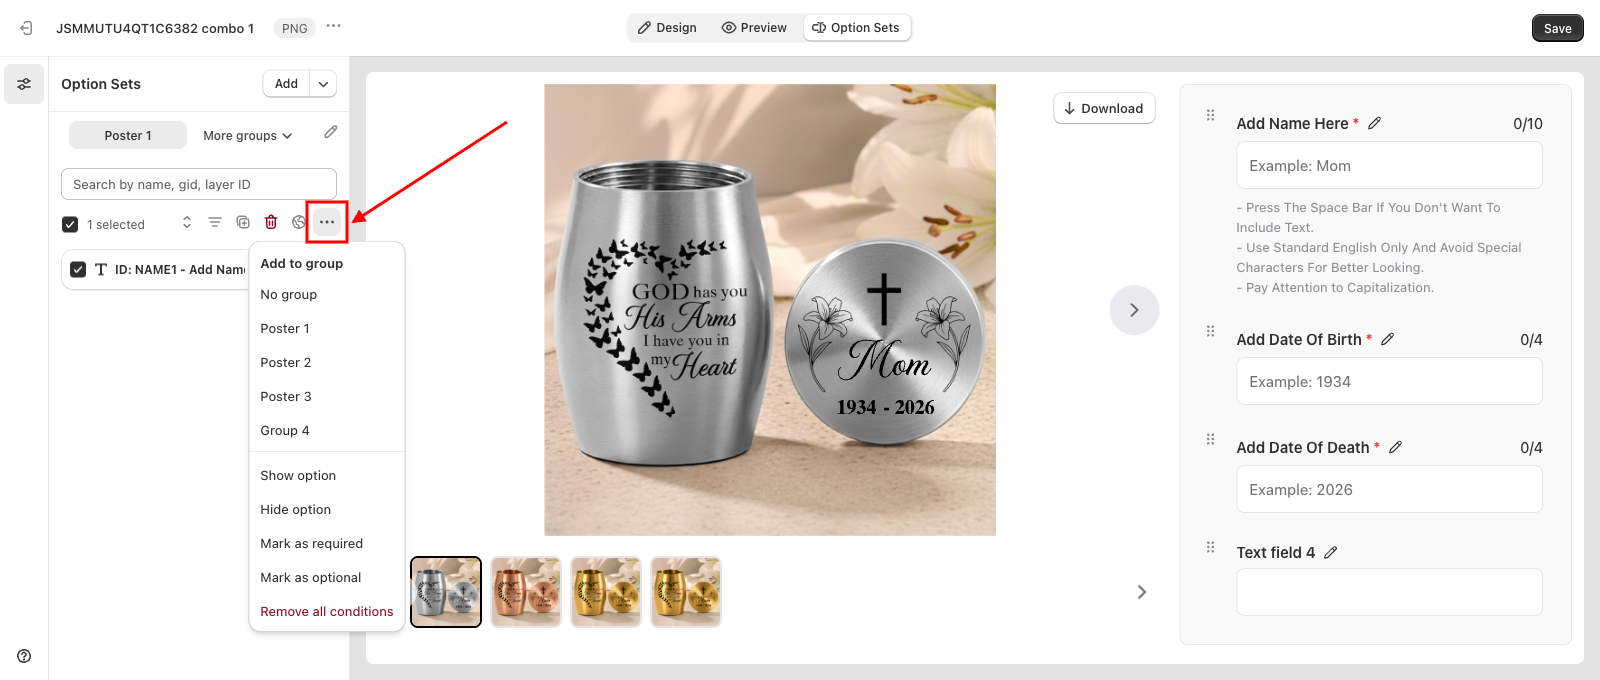
Options left on No group stay in the Default tab. On your storefront they are not hidden: they appear at the very top of the form, above the first tab and with no heading of their own — the right place for something that applies to the whole order, like a gift note.
The Group section only appears once the option set has a group, so option sets that do not use them look exactly as they always have.
📌 Tabs appear on your storefront once the option set has two or more groups. With a single group the form stays as one plain list.
Customer storefront experience
On the product page the groups become a tab strip pinned to the top of the form, with a divider carrying the group's name before its first field.
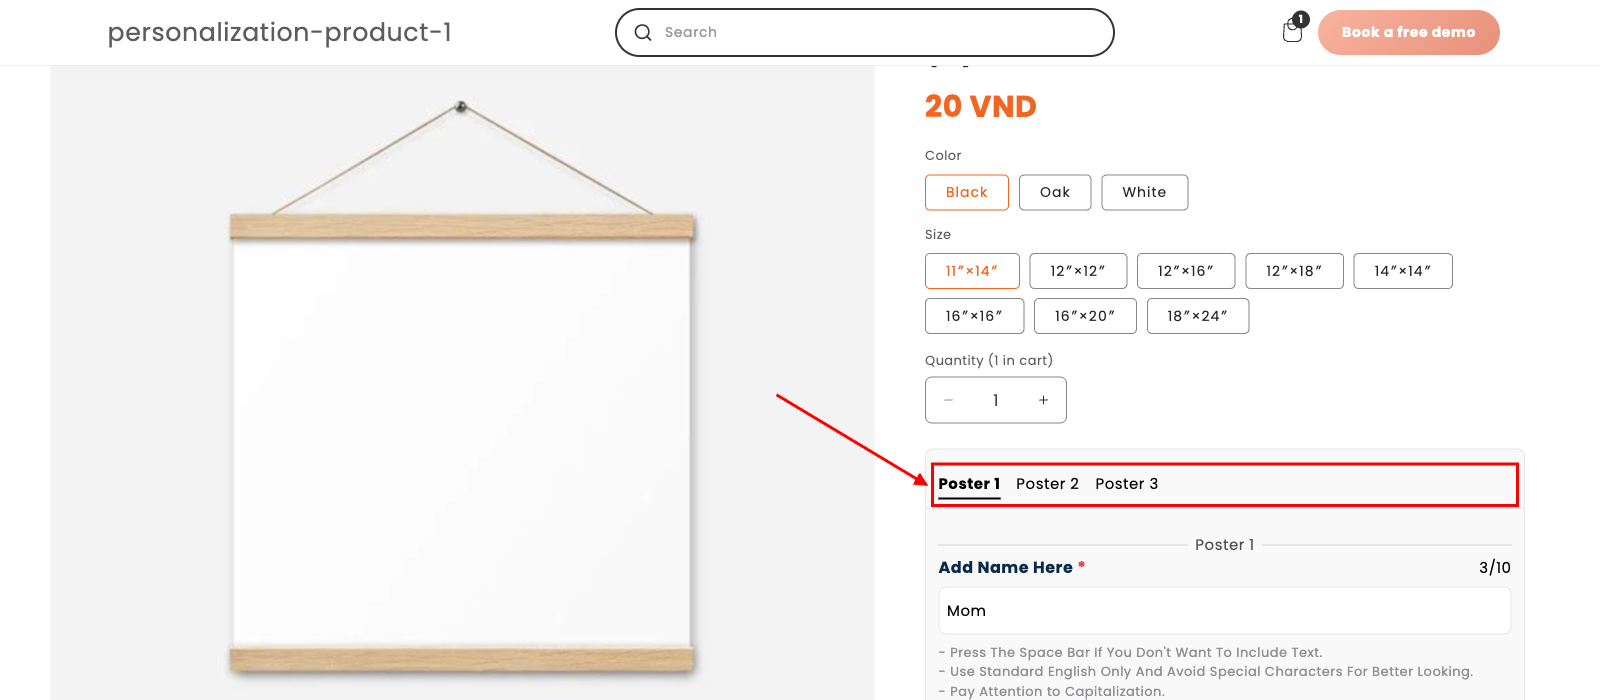
Clicking a tab scrolls to that group and moves the preview to the matching design in one step. Every field is still on the page the tabs move customers around the form, they do not hide parts of it, so nothing is missed and nothing is submitted tab by tab. On a phone the strip scrolls sideways, with any tabs that do not fit under a … button.
Instead of the row of thumbnails, the preview shows the group's name with arrows either side; stepping through with those moves the tabs and the form along with it.
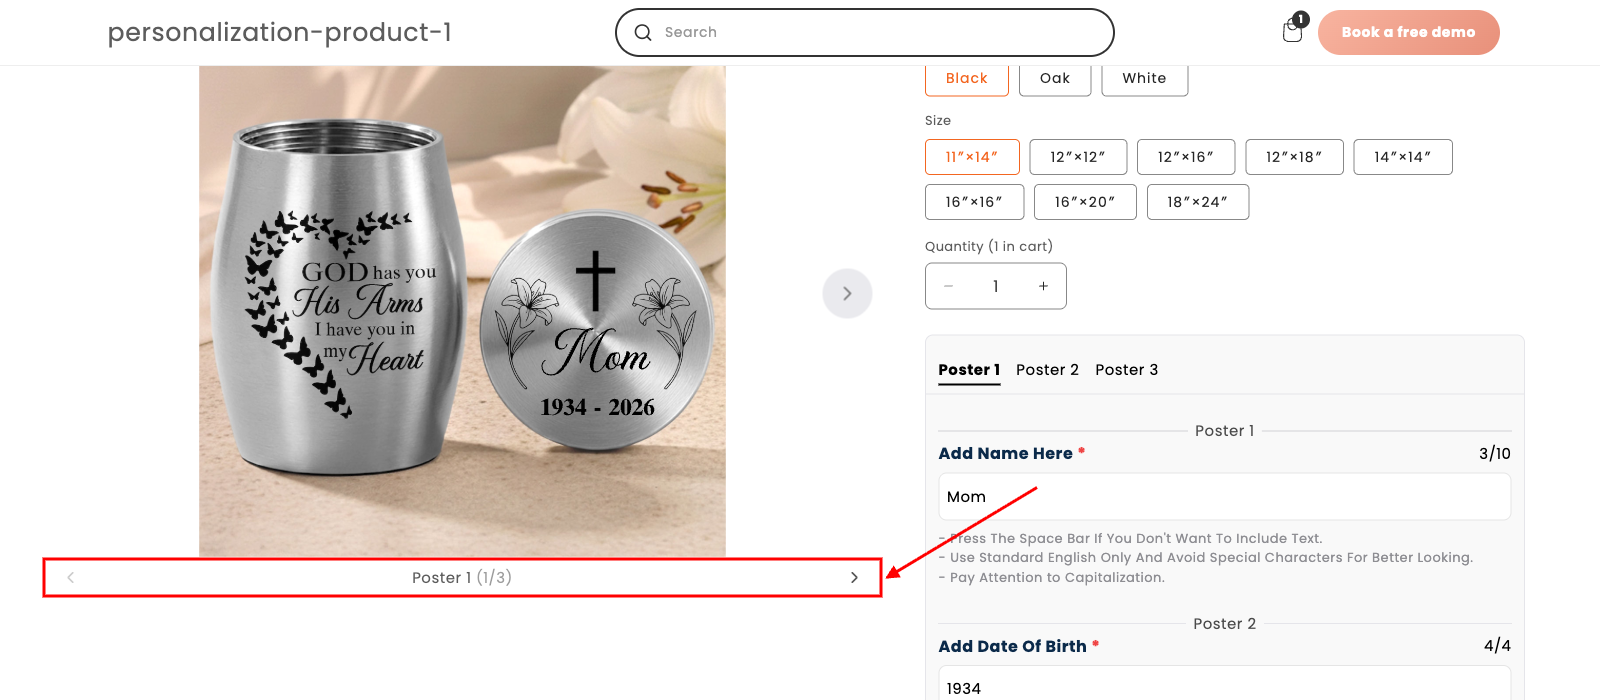
Switching to a variant on a different template starts the form again from the first group and the first design, since templates behind different variants can have different groups. And if conditions hide every option in a group, that group simply drops its tab.
⚠️ If a product uses several option sets, set your groups up in one of them only. Groups from different option sets merge into a single tab strip on the storefront, which is rarely what you want.
Groups are automatically linked to previews based on their order. Group 1 will display Preview 1, Group 2 will display Preview 2, and so on. If you change the group order, the corresponding preview order will change accordingly.
📌 Don't forget to click Save once you're happy with the setup, and publish the campaign again — customers keep seeing the old form until you do. Make sure the option set's status is Active (not Draft) as well.
Updated on: 23/09/2026
Thank you!